How to Start a Shopify Store in 2025: Step-by-Step Guide to Build, Launch & Grow Your Online Business
How to Start a Shopify Store in 2024: Step-by-Step Guide to Build, Launch & Grow Your Online Business

Have you ever thought about selling something online but weren't sure where to start? Maybe you create handmade jewelry, stylish clothes, cool gadgets, or digital products, and you want to turn that into a real business.
Good news! You don’t need to be a tech expert or have a lot of money to build an online store. With Shopify, you can create a store in just a few hours and start selling to customers all over the world.
Even some of the biggest brands, like Netflix, Red Bull, and Heinz, use Shopify to power their stores. But guess what? Shopify isn’t just for big businesses! More than 4 million small business owners are already making money with their Shopify stores—and you can too!
Step-by-Step Shopify Tutorial for Beginners
This Shopify tutorial for beginners will guide you step by step on how to start a Shopify store—from setting up your account to launching and getting your first sale.
So, if you’ve ever wanted to start your own online business, now is the perfect time. Let’s dive in and make it happen!
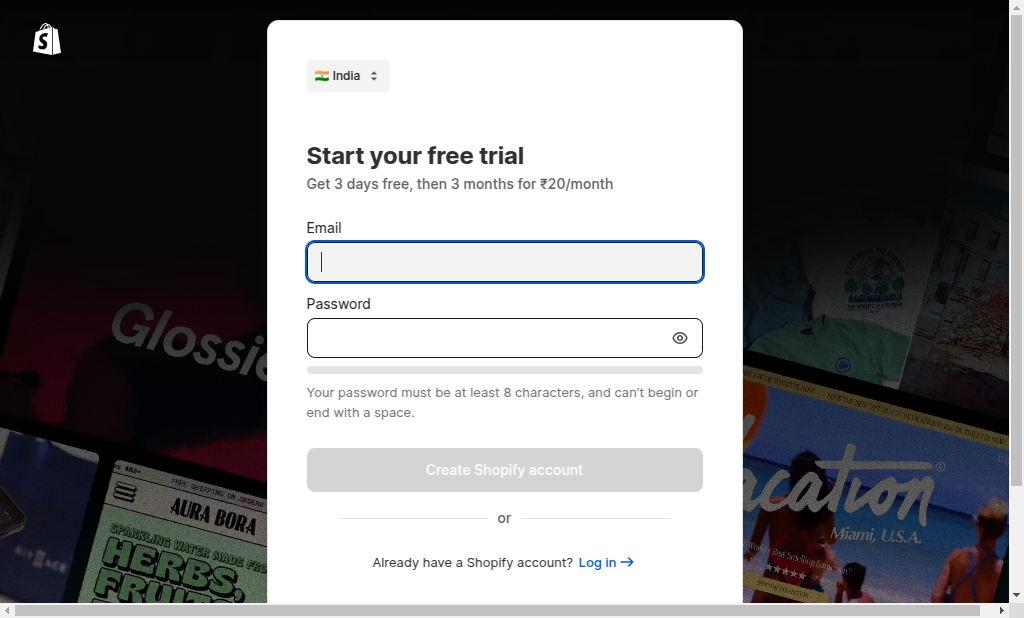
Step 1: Sign Up for Shopify – Your Online Store Starts Here!
Ever thought about starting your own business but felt overwhelmed by the process? The good news is that Shopify makes it incredibly simple, even if you have no experience in eCommerce! Let's start by creating your account—and don't worry, you can try it for free before making any commitment.
Here's how to sign up:
- Go to Shopify.com
- Click the "Start Free Trial" button
- Answer a few quick questions (optional, but helps personalize your setup)
- Enter your email, create a password, and pick a store name
- Click "Create Store" and you're in!
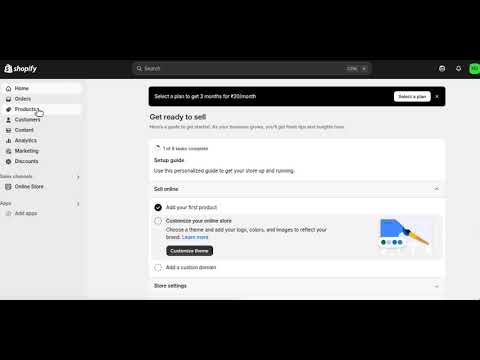
Step 2: Navigating Your Shopify Dashboard (Your Store's Control Center)
Welcome to your Shopify Admin Panel! Think of this as your store's headquarters, where you manage everything from adding products to processing orders and tracking sales. Let's break it down into easy-to-understand sections so you know where to find what you need.
Key Shopify Dashboard Sections
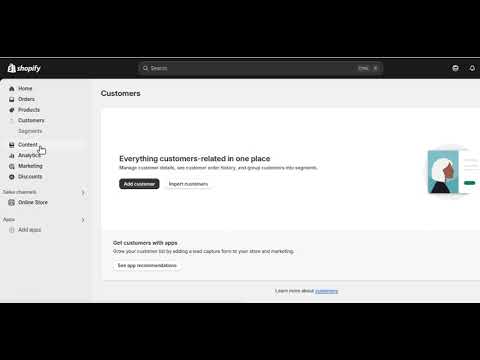
Key Shopify Dashboard Sections:
- Orders – This is where you'll see customer purchases. You can track orders, process refunds, and manage shipping all in one place.
- Products – Here, you can add, edit, and organize your products. Upload high-quality images, write clear descriptions, and set your prices.
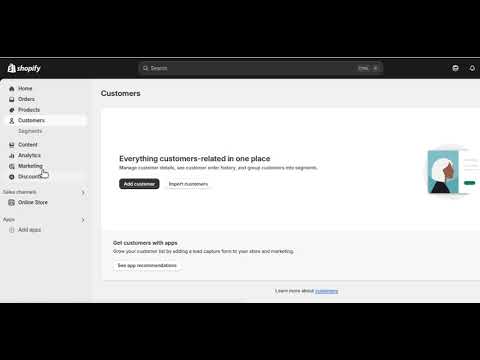
- Customers – Want to build relationships with buyers? This tab helps you view customer details, including emails and order history, so you can send promotions or follow-ups.
- Content – Your store isn't just about selling—it's about building trust. Use this section to create pages like About Us, Contact, and Blog to engage visitors.
- Finances – Stay on top of your earnings! Shopify lets you track sales, expenses, and profits so you always know how your store is performing.
- Analytics – Curious about what's working? This section gives you detailed insights on traffic, best-selling products, and customer behavior so you can make smarter business decisions.
- Marketing – Want more sales? Shopify lets you create Facebook & Google ads, email campaigns, and social media promotions. You can even send automated abandoned cart emails to bring back lost customers.
- Discounts – Set up promo codes, flash sales, and free shipping offers to attract more customers.
- Apps – Customize your store with Shopify apps that add extra features like SEO tools, customer chatbots, and faster checkout options.
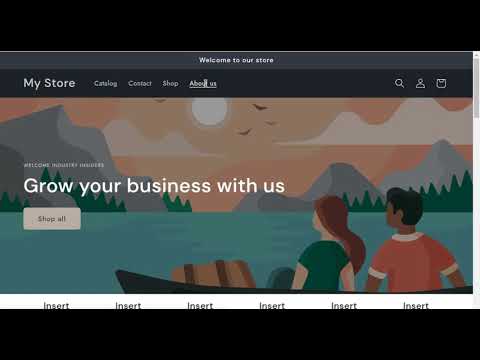
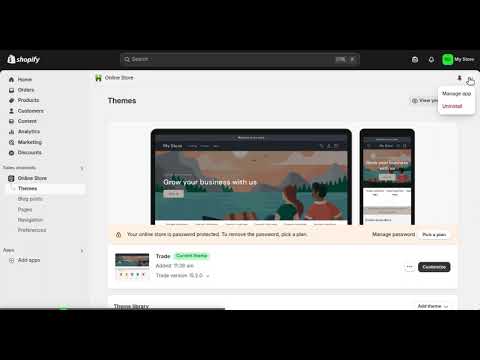
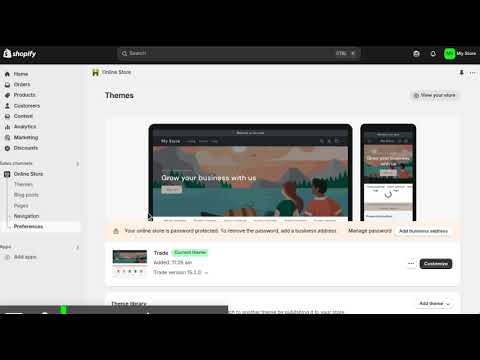
Step 3: Selecting the Perfect Shopify Theme for Your Store
Your store's look and feel play a huge role in attracting customers and making a lasting impression. When you create a Shopify account, a default theme is automatically assigned to your store. But don't worry—you can easily switch to a custom Shopify theme that matches your brand identity.
How to Choose a Shopify Theme

Access Your Theme Settings
- Log in to your Shopify Admin Dashboard.
- Click on Online Store from the left-hand menu.
- Select Themes from the dropdown list.
Explore Free & Premium Themes
- Scroll down to Popular Free Themes to explore Shopify's free theme options.
- Click Visit Theme Store if you want a broader selection, including premium Shopify themes with advanced customization options.
Adding a Theme to Your Store
- Once you find a theme you love, click the Add button.
- The theme will now appear in your Theme Library within the Shopify Admin panel.
Preview Your Theme Before Applying It
- Before making it live, it's a good idea to preview how the theme looks.
- Click on the three-dot menu next to the theme in your library.
- Select Preview to see how your Shopify store will appear to visitors.
By following these steps, you can customize your Shopify store's appearance and ensure it aligns with your brand identity.
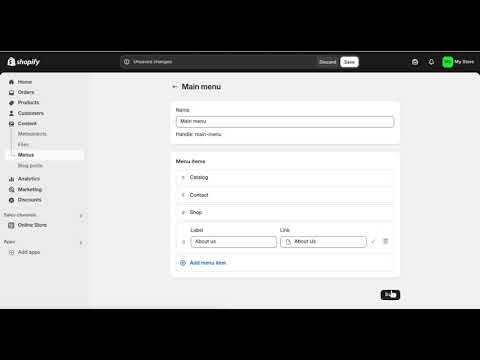
Step 4: Set Up Easy Navigation for a Smooth Shopping Experience
A well-structured menu helps customers quickly find what they need, improving their experience and keeping them on your site longer. If your store's navigation is confusing, people might leave without buying—and we don't want that!
How to Customize Your Shopify Navigation:
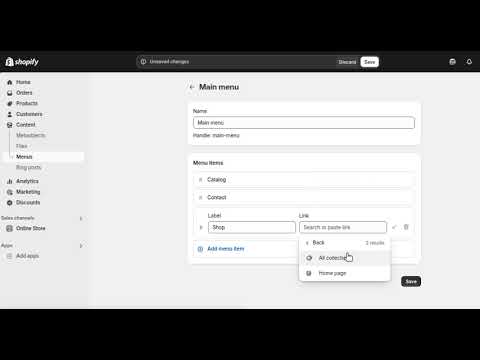
- Go to Online Store > Navigation
- Click on "Main Menu" to edit the navigation bar
- Click "Add Menu Item"
- Name the menu item (e.g., "Shop," "New Arrivals," "Best Sellers")
- Enter a URL or select a page/category to link it
- Click Save
Setting Up Your Footer Menu (Important for Trust & Support)
Your footer menu is the place to add essential pages like Privacy Policy, Contact Us, FAQs, and Shipping Information.
- Click "Footer Menu" in the Navigation section
- Click "Add Menu Item"
- Name it (e.g., "Refund Policy," "Track Your Order")
- Paste the appropriate link
- Click Save
Pro Tip: Use drop-down menus to group related pages under a single category. For example, under "Shop," you can have subcategories like Men, Women, Accessories, Sale Items, etc.
Set Up Easy Navigation in Shopify store for a Smooth Shopping Experience
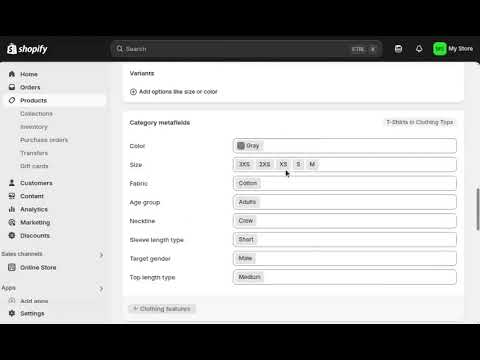
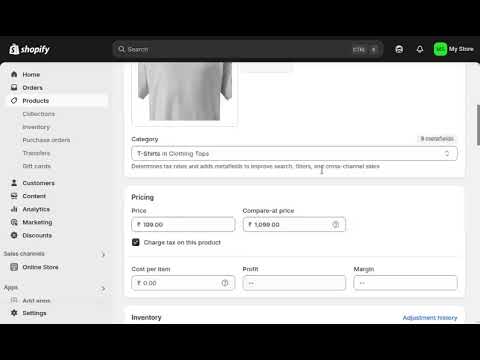
Step 5: Add & Manage Products – The Heart of Your Store
Now that your store looks great, it's time to add products and start selling! Shopify makes this process super easy, whether you're adding physical products, digital downloads, or services.
How to Add a New Product:

- Go to Products > Click "Add Product"
- Enter a Product Title (Keep it short and clear, e.g., "Handmade Soy Candle - Lavender")
- Write a Product Description (Highlight key features, benefits, and why it's a must-have!)
- Upload High-Quality Images (Clear, professional photos help increase sales)
- Set the Price & Stock Quantity
- Click Save
Organizing & Editing Your Product Listings
Your Shopify store isn't just about adding products—it's about keeping everything organized so customers can easily find what they need.
Duplicating a Product (For Similar Variations)
If you sell similar products with slight variations (like different colors or sizes), you can duplicate an existing listing instead of creating each one from scratch.
- Go to Products > Select the product you want to duplicate
- Click "Duplicate"
- Rename the duplicate product and adjust any details (e.g., color, size, price)
- Click Save
Duplicating a Product
Editing an Existing Product
If you need to update product details like price, description, or images:
- Go to Products > Click on the product name
- Make your updates
- Click Save
Pro Tip: Regularly update product descriptions and images to keep your store fresh and engaging. If a product isn't selling well, try tweaking its title or images to attract more clicks!
Managing Where Your Product is Sold (Sales Channels Setup)
Not every product needs to be available on all platforms. Shopify lets you include or exclude products from different sales channels like your online store, Instagram, Facebook, and more.
- Go to Products > Click on the product
- Scroll to "Manage Sales Channels"
- Select or unselect where you want the product to be available
- Click Save
Pro Tip: If you're selling on Instagram or Facebook, make sure only relevant products appear there to match your audience's interests.
Tagging & Categorizing Products for Better Store Organization
Adding tags and categories makes it easier for customers to browse your store efficiently.
- Go to Products > Select a product
- Scroll to the "Organization" section
- Add relevant tags (e.g., "Handmade," "Eco-friendly," "Limited Edition")
- Click Save
SEO Tip: Use customer-friendly keywords in your tags. If people search for "vegan skincare," "summer dresses," or "wireless earbuds," and your product tags include those terms, your items will appear in Shopify search results more easily.
Optimizing Your Products for Google Search (SEO Best Practices)
If you want more traffic from Google, your product pages need to be optimized!
- Go to Products > Click the product name
- Scroll to "Search Engine Listing Preview"
- Click Edit Website SEO
- Enter a catchy title (e.g., "Handmade Lavender Soy Candle – Relaxing & Eco-Friendly")
- Write a short, keyword-rich meta description
- Click Save
SEO Tip: Use keywords that people actually search for. Example: Instead of just "Handmade Candle," try "Handmade Soy Candle for Relaxation" to attract more potential buyers.
Archiving or Deleting a Product
Archiving a Product (Hide Without Deleting)
- Go to Products > Click the product
- Click "Archive"
Deleting a Product Permanently
- Go to Products > Click the product
- Click "Delete"
Pro Tip: Archiving is better than deleting if you might restock the product in the future.
Step 6: Set Up Payments & Checkout – Start Accepting Orders!
Now that your Shopify store is coming together, it's time for the most important step—getting paid! Setting up payments ensures that customers can buy your products smoothly and that you can receive payments securely and on time.
Shopify offers multiple payment options, but the easiest way to get started is with Shopify Payments—a built-in payment gateway that allows you to accept credit cards, Apple Pay, Google Pay, and other payment methods without extra transaction fees.
How to Set Up Shopify Payments (Step-by-Step Guide)
Check Your Eligibility
Before you activate Shopify Payments, confirm that your country is supported. Shopify Payments is available in certain regions, so visit the Shopify Payments page to see if your store qualifies.
Enable Two-Step Authentication (2FA) for Security
To protect your store and financial details, make sure two-step authentication (2FA) is turned on. This adds an extra layer of security when accessing your Shopify account.
Activate Shopify Payments
- Go to Settings > Payments in your Shopify admin panel.
- Click on "Activate Shopify Payments."
- Confirm your selection—this will replace any third-party payment provider if one is already enabled.
Enter Your Business & Banking Details
Shopify requires your business name, bank account details, and tax information to process payments. Make sure all details are accurate and match your official documents to avoid payment delays.
Set Your Store Currency
Choose the currency your store will use for product pricing and transactions. Once you make your first sale, you cannot change it without contacting Shopify support.
Complete Business Verification
Depending on your location and business type, Shopify may ask for:
- Tax ID, Business Number, or EIN (for US-based stores)
- VAT Number (for stores in Europe)
- Personal details for identity verification
Upload Verification Documents
To comply with financial regulations, Shopify may require you to upload identity verification documents (such as a government-issued ID and proof of address). Make sure they are clear and up to date.
Wait for Shopify's Approval
Once you submit your details, Shopify will review them. This process may take a few hours to a couple of days. Your store will still be active during this time, but payouts may be on hold until approval is complete.
Customize Your Payment Settings
Once Shopify Payments is active, you can:
- Set automatic or manual payouts to your bank account
- Enable fraud prevention tools to secure transactions
- Offer local payment methods based on customer preferences
Pro Tip: If Shopify Payments isn't available in your country, you can still integrate PayPal, Stripe, or other third-party payment gateways to accept payments.
Configuring Your Shopify Checkout (Make Buying Easy!)
The checkout process is where customers finalize their purchases, so it needs to be smooth, secure, and hassle-free. Here's how to set it up:
Go to Settings > Checkout
Customize Checkout Options, Including:
- Checkout language & design (match it with your brand)
- Customer account preferences (guest checkout or required login)
- Shipping & delivery options
- Taxes & currency settings
Add a Checkout Button
Make sure your checkout button is visible on product pages and the cart page. A clear, well-placed checkout button reduces cart abandonment rates.
Pro Tip: A simple, one-page checkout increases conversions and reduces cart abandonment. Shopify allows you to streamline the checkout process to make it as quick as possible for customers.
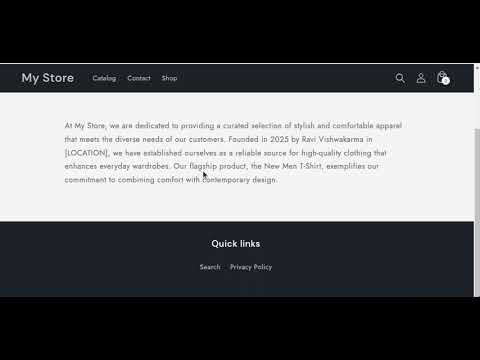
Step 7: Add Essential Pages to Your Shopify Store
Your Shopify store is more than just a place to sell products—it's your brand's online home. To build trust with customers and provide them with the information they need, you must create essential pages like About Us, FAQs, Contact, and Shipping Policy.
Without these pages, visitors may feel uncertain about your store, which can lead to lost sales. But don't worry! Adding pages in Shopify is quick and easy, and I'll guide you through every step.
How to Add Pages to Your Shopify Store (Step-by-Step Guide)
- Go to Shopify Admin > Online Store > Pages
- Click "Add Page"
- Enter a clear and relevant page title (e.g., "About Us," "Return Policy," "FAQs")
- Use the text editor to format your content—add images, tables, links, and even videos
- Set visibility: Choose whether to publish immediately or schedule for later
- Click "Save"
Pro Tip: Your page title appears in search results and browser tabs, so make it concise, relevant, and SEO-friendly to attract more visitors.
Must-Have Pages for a Successful Shopify Store
- About Us – Share your brand's story, values, and what makes your store unique. Customers love buying from brands they connect with!
- Contact Us – Make it easy for customers to reach you via email, phone, or social media. Consider adding a contact form for convenience.
- FAQs (Frequently Asked Questions) – Address common customer concerns about shipping, returns, product details, and payment methods.
- Shipping & Returns Policy – Be clear about shipping costs, delivery timeframes, return eligibility, and refund procedures. Transparency reduces abandoned carts!
- Privacy Policy – Inform customers about how their data is collected, stored, and protected. This page is legally required in many regions.
- Terms & Conditions – Outline your store's policies, buyer responsibilities, and legal protections.
How to Add Pages to Your Store's Navigation Menu
Once your pages are created, they need to be easily accessible for customers. You can do this by adding them to your main menu or footer menu.
- Go to Shopify Admin > Online Store > Navigation
- Select either "Main Menu" (for frequently used pages) or "Footer Menu" (for legal and support pages)
- Click "Add Menu Item"
- Enter the menu item name (e.g., "FAQs," "Contact Us," "Returns")
- Choose the page you created from the list
- Click "Save"
Editing & Updating Your Shopify Pages
Your store isn't static—as your business grows, you may need to update policies, add new FAQs, or change your brand story. Here's how:
- Go to Shopify Admin > Online Store > Pages
- Click the title of the page you want to edit
- Make your updates (change text, add new images, modify links, etc.)
- Click "Save"
Step 8: Set Up Shipping Rates for Your Shopify Store
Shipping plays a crucial role in your Shopify store's success. Clear and fair shipping rates not only help customers make purchasing decisions but also prevent abandoned carts caused by unexpected shipping costs.
Shopify allows you to set up flat-rate shipping, weight-based shipping, location-based shipping, and even real-time carrier rates. Let's go step by step to configure your shipping settings!
How to Set Up Shipping Rates in Shopify (Step-by-Step Guide)
- Go to Shopify Admin > Settings > Shipping and Delivery
- Choose the shipping profile you want to modify and click Manage
Add a Shipping Rate
- Click "Add Rate" and enter the rate details (e.g., name, price, weight range).
- Choose a flat rate or customized rate based on weight, price, or location.
Set Conditions (Optional)
- Add weight-based or price-based conditions (e.g., "Free shipping on orders over $50").
Adjust Carrier-Calculated Rates (Optional)
- If using real-time carrier rates, you can increase or decrease shipping prices based on your business strategy.
Save Your Changes
- Click Done, then Save your shipping rate settings.
Pro Tip: If you use Shopify Payments, you can set up local currency shipping rates to provide customers with pricing in their own currency.
Types of Shipping Options You Can Offer
- Flat-Rate Shipping – Charge a fixed amount for shipping (e.g., $5 per order).
- Free Shipping – Offer free shipping on all orders or set a minimum purchase amount.
- Weight-Based Shipping – Charge shipping fees based on product weight.
- Location-Based Shipping – Charge different rates depending on the customer's location.
- Carrier-Calculated Rates – Let carriers like UPS, FedEx, or USPS determine the cost at checkout.
Step 9: Set Up Tax Rates for Your Shopify Store
Taxes might not be the most exciting part of setting up an online store, but they're essential for compliance. Shopify simplifies the process by allowing you to automate tax calculations based on your store's location.
How to Set Up Taxes in Shopify (Step-by-Step Guide)
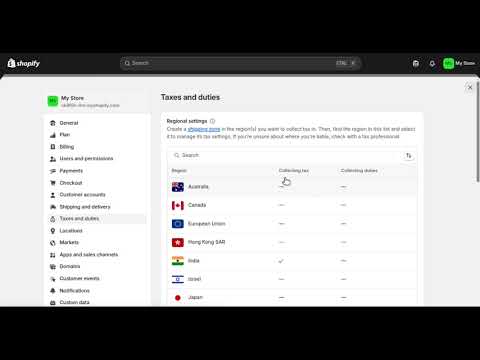
- Go to Shopify Admin > Settings > Taxes and Duties
- Under "Manage Sales Tax Collection", select your country or region
- Click "Collect Sales Tax" to enable tax collection for that region
- Enter your tax number (If you haven't received one yet, you can leave this blank and update it later)
- Click "Confirm Tax Collection"
Adding Additional Tax Regions (If Needed)
- If you sell to multiple countries or states, repeat the process to set up taxes for different regions.
Managing Tax Overrides & Exemptions
- Shopify allows you to apply custom tax rules, exemptions, and overrides for specific products or locations.
Pro Tip: If you're unsure about tax regulations, consult with a tax professional or check with local authorities to avoid penalties.
Why Proper Shipping & Tax Setup is Important?
- Avoid Unexpected Costs – Customers appreciate transparent pricing.
- Increase Conversions – A well-structured shipping policy reduces cart abandonment.
- Stay Compliant – Proper tax setup ensures your business meets legal requirements.
Step 10: Connect Your Domain to Your Shopify Store
Your domain is your store's online identity—it's how customers find and remember you. Instead of using Shopify's default subdomain (yourstorename.myshopify.com), it's best to connect a custom domain (e.g., www.yourstore.com) to make your store look more professional and trustworthy.
How to Connect a Domain to Shopify (Step-by-Step Guide)
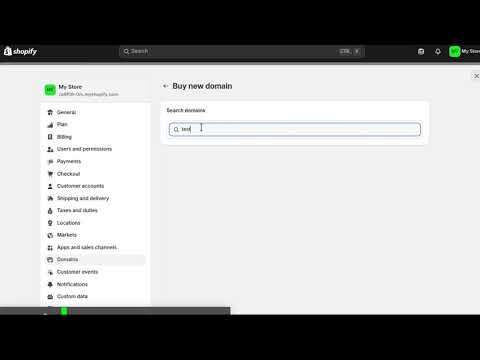
- Go to Shopify Admin > Settings > Domains
- Choose "Buy new domain" (if you need a new one) or "Connect existing domain" (if you already own one).
If You're Purchasing a New Domain:
- Shopify allows you to buy a domain directly through them, making setup easier.
- Prices vary but typically start around $14 per year.
If You Already Own a Domain from a Provider Like GoDaddy, Namecheap, or Google Domains:
- Enter your domain name (e.g., clothingstore.com) and click Next.
- Click "Connect Automatically" (if your provider supports it) or follow Shopify's manual connection instructions.
- Click Close and wait up to 48 hours for domain verification.
- Once verified, your domain will show a "Connected" status in the Shopify admin panel.
Pro Tip: Make sure to set your custom domain as the primary domain in Shopify so that all traffic redirects properly.
Step 11: Test Your Shopify Store Before Launching
Before your store officially goes live, it's important to test everything to make sure customers have a smooth shopping experience. Shopify lets you place a test order to check your payment and checkout process without charging your card.
How to Place a Test Order on Shopify
- Go to Shopify Admin > Settings > Payments
- Click Edit and enable "Use Test Mode" (this prevents real charges from being processed).
- Click Save and proceed to your store.
Simulating a Test Purchase:
- Visit your online store as a customer would.
- Add a product to your cart and go through the checkout process.
- Enter test payment details (Use the test card numbers below):
| Card Type | Test Card Number |
|---|---|
| Visa | 4242 4242 4242 4242 |
| Mastercard | 5555 5555 5555 4444 |
| American Express | 3782 822463 10005 |
| Discover | 6011 1111 1111 1117 |
- Use any name, a future expiration date, and a random 3-digit CVV.
- Complete the checkout and verify that the order appears correctly in your Shopify dashboard.
Pro Tip: Don't forget to disable test mode once you've confirmed that everything is working smoothly!
Launch Your Shopify Store
Step 12: Launch Your Shopify Store
Now comes the exciting part—going live! Once you're happy with how your store looks and works, it's time to remove password protection so customers can visit and start shopping.
How to Remove Password Protection from Your Store
- Go to Shopify Admin > Online Store > Preferences
- Scroll to the "Password Protection" section
- Uncheck the box that says "Restrict access to visitors with the password"
- Click Save
Congratulations! Your Shopify store is now live and ready to accept customers.
Pro Tip: Announce your store's launch on social media, email newsletters, and Google Ads to drive your first visitors!
How Much Does It Cost to Start a Shopify Store?
Shopify offers several pricing plans based on your needs. Here's a breakdown of the current Shopify pricing options:
| Shopify Plan | Monthly Cost | Best For |
|---|---|---|
| Basic | $29/month | Individuals & small businesses |
| Shopify (Standard) | $79/month | Small teams & growing businesses |
| Advanced | $299/month | Medium to large businesses |
| Shopify Plus | $2,300/month | High-volume enterprises |
Pro Tip: Shopify offers a free trial, so you can start setting up your store before committing to a paid plan.
How Much Does Shopify Charge Per Transaction?
Shopify charges transaction fees depending on your selected plan and payment method. Here's a breakdown of Shopify's transaction fees:
Basic Shopify Plan ($29/month)
- Domestic credit card fees: 2.9% + $0.30 per transaction
- International/Amex credit card fees: 3.5% + $0.30
- Third-party payment provider fees: 2.0%
- Currency conversion fee: 2.0%
Shopify Standard Plan ($79/month)
- Domestic credit card fees: 2.7% + $0.30 per transaction
- International/Amex credit card fees: 3.4% + $0.30
- Third-party payment provider fees: 1.0%
- Currency conversion fee: 2.0%
Advanced Shopify Plan ($299/month)
- Domestic credit card fees: 2.4% + $0.30 per transaction
- International/Amex credit card fees: 3.3% + $0.30
- Third-party payment provider fees: 0.5%
- Currency conversion fee: 2.0%
Pro Tip: If you use Shopify Payments instead of a third-party payment provider (like PayPal or Stripe), you can avoid extra transaction fees and save money on every sale.
Legal Requirements for Setting Up a Shopify Store
1. Privacy & Data Protection Laws
- GDPR – Required if selling to EU customers.
- CCPA – Applies to businesses collecting data from California residents.
- Cookie Laws – Many regions require cookie consent notifications.
Solution: Add a Privacy Policy page and a cookie consent banner to stay compliant.
2. Email Marketing Compliance
- Follow CAN-SPAM Act and GDPR email rules.
- Every marketing email must include an unsubscribe option.
Solution: Use double opt-in for email sign-ups to ensure compliance.
3. Payment & Financial Regulations
- Shopify Payments is PCI-compliant for secure transactions.
- Be aware of currency conversion fees and tax implications if selling internationally.
Solution: Choose a payment gateway that supports fraud protection.
4. Consumer Protection Laws
- Your product listings must be honest.
- Customer reviews cannot be altered or deleted unfairly.
Solution: Add a Terms & Conditions page outlining refund and shipping policies.
5. Tax Compliance
- If selling in the U.S. or EU, you may need to charge sales tax or VAT.
- Shopify automatically calculates taxes, but ensure correct tax collection.
Solution: Set up automated tax collection in Shopify under Settings > Taxes.
6. Product Restrictions & Shipping Rules
- Some products (alcohol, CBD, medical supplies) have strict regulations.
- Shipping certain items internationally may require special documentation.
Solution: Check Shopify's list of restricted items and ensure your products meet shipping laws.
Frequently Asked Questions (FAQs)
1. How Long Does It Take to Set Up a Shopify Store?
Setting up a Shopify store can take as little as 3-4 days if you're keeping things basic. This includes adding your products, setting up payment methods, and choosing a template.
However, if you plan to add advanced features like SEO optimization or customizations, it could take longer. Just keep in mind that setting up your store is only the first step—making it successful is a continuous process!
2. What Legal Steps Do I Need to Take to Start a Shopify Store?
When launching a Shopify store, it's important to ensure everything is legal and compliant. Here are a few key steps:
- Privacy Policy: Comply with GDPR and CCPA to protect customer data.
- Email Marketing: Follow the CAN-SPAM Act by offering opt-out options.
- Sales Tax Compliance: Shopify allows automatic tax rates based on location.
- Consumer Protection: Follow fair business practices like the FTC Act.
Tip: If you're unsure about legal details, consult a professional to ensure you're fully covered.
3. What Are the Main Costs Involved in Running a Shopify Store?
| Shopify Plan | Monthly Cost | Best For |
|---|---|---|
| Basic Shopify | $32/month | Small businesses or beginners |
| Shopify | $92/month | Growing businesses |
| Advanced Shopify | $399/month | Medium to large businesses |
| Shopify Plus | $2,000+/month | High-volume enterprises |
4. How Do I Connect My Domain to Shopify?
Connecting your domain to Shopify is easy! Follow these steps:
- Go to Settings > Domains in Shopify Admin.
- Select Connect existing domain and enter your domain.
- Wait up to 48 hours for verification.
- Once verified, it will be listed under Third-Party Domains.
5. How Can I Improve My Shopify Store's SEO?
To boost your store's visibility on Google, follow these SEO strategies:
- Use Keywords: Add relevant keywords in product titles and descriptions.
- Image Optimization: Use high-quality images with alt text.
- SEO-Friendly URLs: Ensure URLs contain relevant keywords.
- Mobile Optimization: Shopify stores should be fully responsive.
Tip: Use apps like SEO Manager to automate SEO improvements.
6. What's the Best Way to Handle Taxes on Shopify?
Shopify makes tax management simple:
- Set Tax Rates: Go to Settings > Taxes to configure rates.
- Automatic VAT Calculation: Shopify can calculate VAT/sales tax automatically.
- Add Tax Number: Stay compliant by entering your tax number.
7. Can I Use My Own Theme or Design on Shopify?
Absolutely! You can upload your own custom theme or customize an existing one. If you need a professional Shopify store, Zestminds can help!
8. How Can I Offer Discounts and Promotions?
Shopify allows various discount options:
- Percentage-Based Discounts (e.g., 20% off)
- Fixed Amount Discounts (e.g., $10 off)
- Free Shipping to increase conversions
9. How Do I Test My Shopify Store Before Launching?
To ensure a smooth checkout experience:
- Enable Test Mode under payment settings.
- Use test credit card details (Visa: 4242 4242 4242 4242).
- Complete checkout and verify everything works.
10. What If I Need Help Setting Up or Managing My Shopify Store?
If you need expert help with:
- Store setup & customization
- SEO optimization
- Ongoing store management
Zestminds is here to help! Contact us for a free consultation to get your Shopify store running smoothly.
Launch Your Shopify Store with Zestminds
Starting a Shopify store can be overwhelming, but you don't have to do it alone! At Zestminds, we specialize in:
- Shopify Store Setup & Customization – High-performing, SEO-optimized stores.
- E-Commerce Strategy & Marketing – Increase traffic and sales with ads and SEO.
- Shopify Compliance & Legal Guidance – Ensure your store meets legal requirements.
Why Choose Zestminds?
- Custom Shopify Development – Fast, responsive, and conversion-optimized designs.
- SEO Optimization & Growth Strategy – Rank higher and drive organic traffic.
- Ongoing Support & Maintenance – Store enhancements and marketing automation.
Let's Get Started!
Request a free consultation today, and let's build your Shopify store the right way!
Table of Contents
- Introduction
- Step 1: Sign Up for Shopify
- Step 2: Navigating Your Shopify Dashboard
- Step 3: Selecting the Perfect Shopify Theme
- Step 4: Set Up Easy Navigation
- Step 5: Add & Manage Products
- Step 6: Set Up Payments & Checkout
- Step 7: Add Essential Pages
- Step 8: Set Up Shipping Rates
- Step 9: Set Up Tax Rates
- Step 10: Connect Your Domain
- Step 11: Test Your Shopify Store
- Step 12: Launch Your Shopify Store
- Shopify Pricing & Transaction Fees
- How Long Does It Take to Set Up a Shopify Store?
- Legal Requirements for Running a Shopify Store
- Frequently Asked Questions (FAQs)
- Launch Your Shopify Store with Zestminds
Need help creating a new store?
Shivam Sharma
About the Author
With over 13 years of experience in software development, I am the Founder, Director, and CTO of Zestminds, an IT agency specializing in custom software solutions, AI innovation, and digital transformation. I lead a team of skilled engineers, helping businesses streamline processes, optimize performance, and achieve growth through scalable web and mobile applications, AI integration, and automation.